Showing posts with label Hair. Show all posts
Monday, 4 August 2014

Review: Long Hair, Don't Care.


Are mirror selfies acceptable for a blog post? I hope so, as I was really lacking a photographer, the quick release plate for my tripod and a nice background to take photographs against today. Plus I cleaned my mirror especially.

Anyway. I go through phases with my hair a lot. Throughout my life I have experimented with different cuts, from the disastrous chin-length bob that had me sobbing for days, to waist-length locks that to be quite honest, I couldn't be bothered dragging a hairbrush through most of the time. I have never really been an extensions kind of girl; in all honesty the thought of wearing something that once belonged on somebody else's head for vanity purposes has never really sat well with me, but since I am going through one of those phases where my own hair isn't growing fast enough for my liking and I envy every single girl I see with huge, voluminous tresses, I thought I would give them a go.

These are the I&K Clip In Straight Hair Extensions from Hairtrade. The pack contains ten super soft clip in pieces of different sizes, allowing you to blend your extensions nicely with the thickness of your natural hair. They are made from 100% human hair, meaning that they can be cut, coloured and styled. As the layers in my hair are cut quite thick, I found that my extensions didn't blend very well when straight, but after curling them and teasing them in to my hair a little bit, I was left with hair fit for a Herbal Essences advert (and also a reminder of how much of a pain in the backside it is to style long hair).

Admittedly, upon trying out these hair extensions I have come to realise that they are just not for me, although I did have fun flicking my new long hair around for the above pictures. The hassle of clipping them in and trying to make them blend with my own hair is outweighed by my desire for an extra fifteen minutes in bed in the morning, and I just don't feel like myself with an extra wad of hair attached to my head. Plus I still feel quite uncomfortable with the fact that it was somebody else's hair, but each to their own. So, whilst I patiently wait for my own hair to grow out again, these will be put away and saved for very special occasions. However, if you are a regular user of hair extensions, I definitely recommend checking out Hairtrade, as they stock extensions in lots of colours, lengths and styles and they are of fabulous quality for the price!

Are you lusting over long locks?

Frances x

DISCLOSURE: PR sample. All opinions expressed are 100% honest and my own.


Wednesday, 19 March 2014

Review: GHD IV Hair Straighteners.

GHD Periwinkle IV Styler: £110*

Since the age of around thirteen when I got my first pair of hair straighteners, I have trialled a fair few brands including Remington, Philips and Vidal Sassoon, but I had never taken the dive in to the highly raved about world of GHD. Admittedly, it's the rather hefty price tag that has scared me off for all these years- My Remington straighteners were half the price of a pair of GHDs and they still did their job well. However, I finally decided it was about time I bit the bullet when I fell in love with the new limited edition pastel collection that GHD have recently brought out. After facing the tough decision between lavender, jade and periwinkle blue, I finally settled on the blue pair, and my, how beautiful they are.

Now, I don't know what it is about GHDs that makes them so special, but these have quickly become my favourites. Maybe I'm just judging by appearance because of my current obsession with everything pastel, as I don't feel that they straighten my hair any better or worse than my other hair straighteners- but just look at them, they're so sleek and super comfortable and lightweight to hold as well. Hitting a maximum temperature of 200 degrees and sporting a round barrel for creating curls and flicks, these are definitely good contender for anybody looking for a new pair of straighteners. Oh, and they feature a 2.7m long power cable and swivel cord, two things that you don't appreciate until you know what it's like to have to bend over backwards to straighten you hair as your plug socket isn't close enough to your mirror.

If you are on the market for a new pair of hair straighteners, you can find GHD straighteners here at Argos, amongst other brands if GHDs still aren't your thing.

What is your favourite brand of hair straightener?
Frances x

*In collaboration with Argos.
Sunday, 12 May 2013

Review: Popband.


Hi ladies! Sorry about the lack of posts over the last few days- I haven't been able to find the concentration to sit down and put any blog posts together... I don't know why but recently I've been having trouble sleeping at night; I thought as soon as I finished uni that I would sleep like a baby! And as a result of this I've been feeling so lethargic during the day :(

Anyway, enough of my moaning! Today's post is a review on some little hair accessories that were kindly sent to me by Popband. I have very thick, stubborn hair, and problem that I have always found myself having to deal with is pulling tangled, broken-off pieces of hair from my hair bands after having to wrestle them out of a messy bun- such a nightmare and so, so painful! However, two weeks ago Popband came to my rescue. I have seen hair ties like these before and have really wanted to try them out as I had heard a lot of good things about them. They claim to be gentle on your hair whilst keeping it firmly in place until you want to take it down, and when you do they won't rip your hair out and they also won't leave that annoying kink behind. Plus, they come in lots of different colours and prints with a sparkly bead attached so that they look pretty worn on your wrist as well as in your hair!

Okay, so they might seem a little gimmicky- they're essentially just a piece of elastic tied in to a loop, right?  But I really do think they work and I won't go back to using a regular hair band- I quite like being able to effortlessly (and even better, painlessly!) take my hair out of a pony tail after my gym sessions and not look like I have just rolled out of bed. And if you're a lazy girl like me and like the work done for you where possible, these won't set you back too much, ranging from just £4-£6 with the option of buying a single band or a multi-pack, plus free shipping within the UK! If you'd like to see what Popband has to offer, visit their website here :) 

Don't you just hate the trouble that comes with tight elastic hairbands? Have you tried Popbands?
*DISCLOSURE: PR samples. My opinions are still 100% honest and my own.
Friday, 23 November 2012

Pink and Purple Dip Dye.


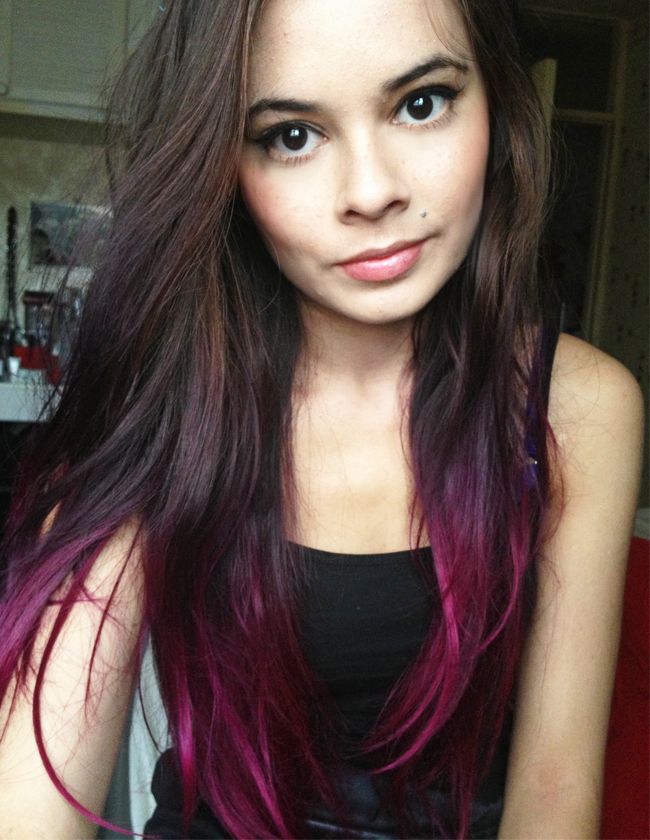
When I did my pink and purple dip-dye a few weeks ago, I had a few people ask me how I did it so I just thought I would type up a quick post on it. 

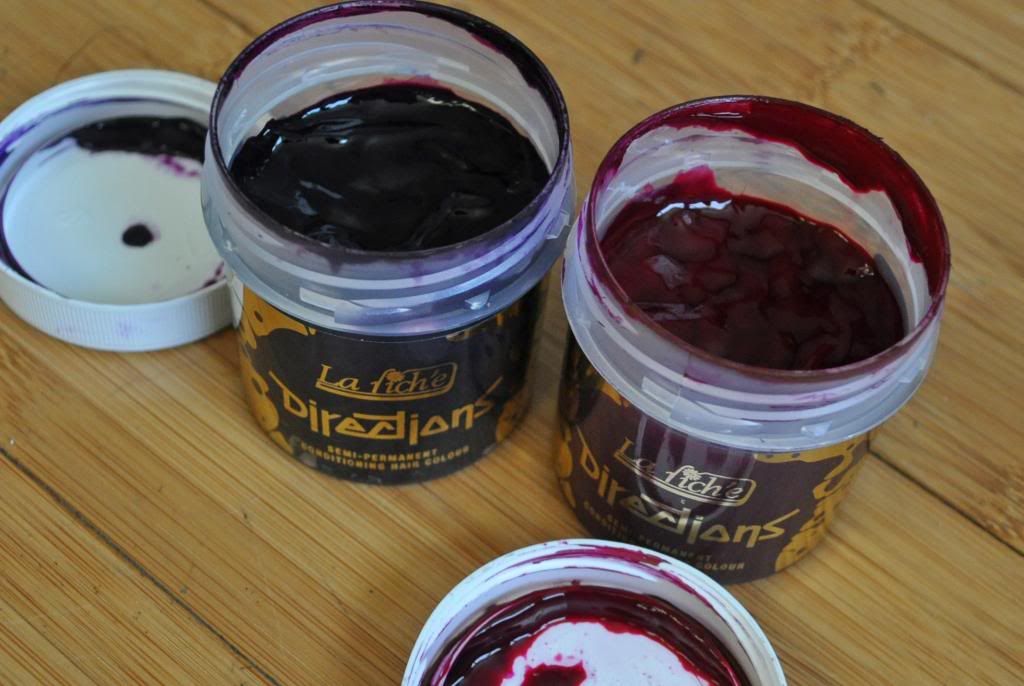
The hair dye I used was Directions, which can be bought online or at "alternative stores" (Afflecks in Manchester or Quiggins in Liverpool if you are in the Northwest). It is pretty cheap, costing around £3.50-5 for a 88ml tub, which contains enough product for 3-4 uses for me. Directions hair dyes come in loads of different bright colours, and they're really handy as they don't need to be mixed and can be kept for up to a year after opening. The shades I used were "Plum" (purple) and "Rose Red" (pink). The disadvantage to this product is that if you have dark hair, you will have to bleach it before you use these hair dyes as they won't show up on darker hair colours (although they will tint it, if that's what you're after).
I didn't want to bleach my hair any further so I just used it on the dip-dye that I already had, which was more of a copper shade than true blonde. I was happy with how the colour turned out, although the purple didn't show up amazingly well, but it was applied where my dip-dye got darker.

I achieved the look using my fingers (wearing gloves, of course!), and dry hair. Using a tint brush may be easier for some; it's up to you! I started with the purple shade first, rubbing it in to the top part of my dip-dye and making sure that I really worked it in around the transition between the purple and my natural hair colour so that it would gradually change colour and so that there were no harsh lines. I then rinsed off my gloves and started again with the pink dye, this time applying it to the ends of my hair, again making sure I really blended it in and overlapped it where it met the purple dye. Once I was finished I wrapped my hair in tin foil in sections to prevent myself from making a mess everywhere.

I rinsed the hair dye off after fifteen minutes, which is what the tub recommends. Please be warned that you will be stood hanging your head over your bathtub for quite a while; the water NEVER seemed to want to run clear- I was still having purple baths a week later! Directions hair-dye is semi-permanent, meaning that it will last around a month in your hair. I found that I needed to re-dye my hair after around three weeks as it was starting to fade and looked like I had dyed my hair a strange, pukey colour, haha!

I hope this post helped you if you are planning on doing this. I think I want to try a different colour next time, what colour do you think I should try?

Monday, 11 June 2012

My new ombre hair!

Hey girlies!

I just thought I would do a quick post today to show you my new hair! After about six months of contemplating it I finally bit the bullet and booked myself an appointment at the hair dressers to get my hair dip-dyed. The finished result isn't how I initially planned for it to look (don't you love it when hair dressers don't listen to you) but thankfully I love it none-the-less! I was pretty nervous before and during the process, as the last time I did anything adventurous with my hair was when I was fourteen and had bright red flashes haha!

Taken with DSLR.

Taken with iPhone

I thought I would include the iPhone photograph as well because I think it captures the colour of my hair better because I didn't have to use flash, although it makes my face look horrendously washed out haha! I might update this post with better photos tomorrow when I have more adequate lighting to take them in.

The colour was achieved by just lightening my hair; no toner was needed which I am glad of as I was in and out of the hair dressers within an hour and a half. I am thinking of lightening the ends a little more myself though to create more of a gradient effect. I also had a lot of layers cut in to my hair to give it some shape, but they will show better when my hair is wavy or curly :)

What do you think of my new hair colour? Have you or are you thinking of jumping on the ombre bandwagon?

Thursday, 26 April 2012

Chalk Pastel Highlights.

If you follow me on Instagram or on my personal Twitter account you may have seen this photo of my pastel highlights. So many people have asked me if they are real haha, and no, they're not. I am far from being brave enough to bleach my hair and stick lots of different coloured dyes in it haha!

I had seen this chalking method on a couple of other blogs recently, and was rather intrigued by it, so when I stumbled across my old chalk pastels from when I studied art in college, I decided to give it a go.


To achieve this pastel highlight look, you dampen a piece of chalk (you can also dampen your hair a little bit) and run it down the length of your hair. You can then wait for your hair to dry and then seal the colour in using your hair straighteners. I like the pastel look on curled hair, when the strands of colour are intertwined with your natural colour.

 Excuse my naked face haha, I wasn't going anywhere!

I personally wouldn't wear this look out, it's far too messy, so if you do, make sure you wear dark colours or put your hair up- the top I'm wearing in these pictures definitely took a battering! I wouldn't recommend doing this if you or other people will be in contact with your hair, the powder does still transfer when touched. The chalk also made my hair feel so dry and matted (hence why my hair is out of control in the picture), which was expected, after all you are applying a powder to your hair which will just suck up all those oils. The beauty of this method, however, is it washes straight out, so if you are just wanting a pop of colour for a night out, a fancy dress party or a photo shoot, then this will give you exactly that, no commitment. It also works on dark hair, as you can see! So when you wash it out, make sure you give your hair a good conditioning treatment afterwards to restore the moisture.


Have you ever tried this? Or are you brave enough to do the real thing?